If you love mobile photography, there’s also plenty to love about iOS 7’s camera and photos improvements. New shooting modes, filters, sharing options, and more await you—here’s an overview of what your device has in store.
The camera app
Functionally, the Camera app in iOS 7 is very similar to its iOS 6 counterpart, with a few nifty new features (even more if you’re planning to pick up an iPhone 5s). That said, the app looks very different—it has traded in its shiny chrome and black for flat black borders and neon highlights.
Gone is the skeuomorphic shutter, replaced with a succinct screen flash; also absent is the options menu—instead, you use gestures to access many camera actions.
Swipe, swipe, swipe, Señora
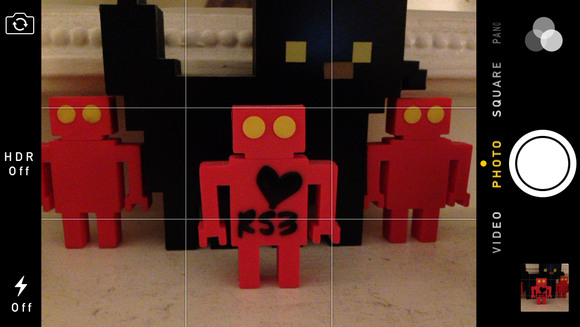
In iOS 6, you changed modes and enabled features such as Panorama by tapping switches or buttons. iOS 7’s Camera app does away with all of these, relying instead on text-labeled modes accessed via swipes. (There are still icons for enabling and disabling flash, switching to the front or back camera, viewing your Camera Roll, and snapping a photo, but these are much simplified compared to their iOS 6 versions.)

To change modes in the new camera, simply swipe to the left or right—or up or down, in landscape view—anywhere on the screen. Below the viewfinder is a carousel of modes, with the current one highlighted in yellow with a dot above it.
The app has four modes in total: Video, Photo, Square, and Pano. (The iPhone 5s features a fifth mode, Slo-Mo, while the iPad version of the app unfortunately lacks the Pano setting, as do older versions of the iPhone.) If you shoot in either Photo or Square, you also have access to HDR (enabled or disabled by tapping the HDR text at the top of the screen in portrait mode) and iOS 7’s new Filters (represented by a Venn diagram of overlapping circles). Once in a particular mode, the app works much like it does in iOS 6: You can tap to focus (or hold to lock your focus); use the white or red shutter button—or the volume buttons—to snap or record; take a panorama; switch to the front camera; or enable the flash.
In video mode, certain iPhone models give you the option of a digital 3x zoom while recording; previously, you could only zoom before making a recording.
iPhone 5s-specific camera features
If you’re planning on picking up an iPhone 5s, you’ll get a few more Camera app features than the ones shipping with the stock iOS 7. Slo-Mo mode lets you film clips at 120 frames per second. Shoot in this mode, and you can slow any part of the resulting clip—the whole thing or parts—with edit handles.
The iPhone 5s also supports burst mode, which can take up to 10 pictures a second: Just tap and hold on the shutter button, and your device will save any non-blurry picture to your camera roll.
Your 5s also makes intelligent decisions about low-light and blurry images when you’re shooting. Automatic image stabilization means that when you snap a photo in low-light conditions, your device will actually take up to four images, merging them together to create the clearest, least-blurry image.
Panoramas, too, have been improved; your iPhone 5s will shoot them at 30 frames per second and automatically adjust for exposure as you pan through the scene.
Filters, square photos, and more, oh my
The Camera app largely borrows its new features from successful third-party apps, though Apple has done a nice job of implementing them and making them feel unique. The first feature, Filters, lets you apply one of eight live filtering options to your images: Mono, Tonal, Noir, Fade, Chrome, Process, Transfer, or Instant. Apply a filter, and the Filters icon changes from black-and-white to color, resembling an RGB color wheel. (Live filters are currently only supported for the iPhone 5 or later or the fifth-generation iPod touch or later.)

Once selected, the filter will stay in that camera mode until you disable it; for example, you can set the Noir filter on Photo mode, switch to Square and shoot an unfiltered image, and then return to Photo mode, which remains set to Noir. Unfortunately, you can’t use live filters in Video or Pano mode. If you don’t want to use a filter while you’re taking photos, you can apply those same filters when editing any image—including panoramas—through the Photos app; there are no filter options for videos, though.
The other new feature for Camera aficionados is Square mode, which limits your framing area to a square photograph—the aspect ratio of choice for popular sharing apps like Instagram.

Whether you’re tired of not being able to fit your traditional composition in a third-party app’s square box, or you simply like square shots, this mode can be pretty useful under the right circumstances. A fun tip: Keep a favorite filter enabled in Square mode, and you can capture a social media–ready version of your full-size snap in moments.
One note for fans of the Camera app’s 3-by-3 Grid mode: Though the option is no longer present in the app itself, you can still enable or disable the grid from Settings > Photos & Camera.
Beyond the Camera app
If you’re used to reaching for the Camera shortcut on your lock screen, never fear—it still exists in iOS 7, just in slightly subtler form. The button is gone, replaced with an unassuming silhouette of the camera icon.
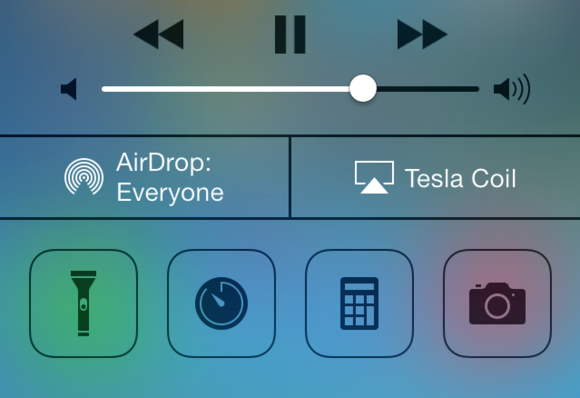
In addition, if you have Control Center enabled, you now have quick access to your camera from anywhere on your device—just swipe up from the bottom of the screen and tap the Camera button.
The Photos app
If you like taking and organizing images, you’ll find that iOS 7’s Photos app is a big step up from previous versions. It features the same white-and-blue minimalistic interface that governs elsewhere in iOS 7, and it offers a new, simplified organization scheme in lieu of multiple tabs and categories.
The Photos app now has just three tabs along the bottom: Photos, Shared, and Albums. Gone are Events, Faces, and Places from the main bar; Events and Faces show up as sub-albums in the Albums tab, while the new Photos tab integrates Places to some degree.
Photos
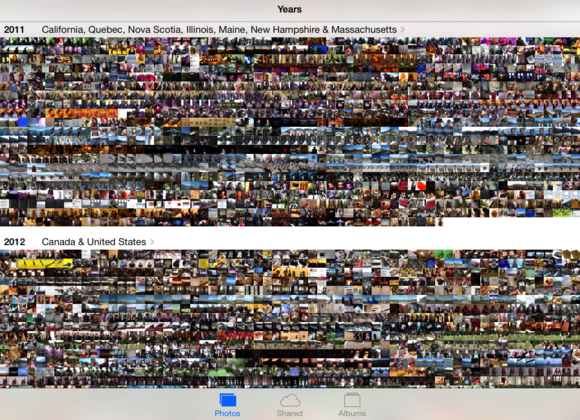
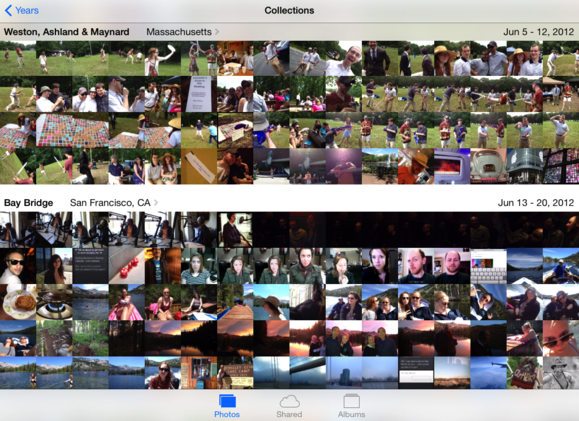
The Photos tab displays a timeline of your images, categorized by Years, Collections, and Moments. Years view shows teensy thumbnails of each year of photos you have stored on your device; tap a specific year to enter Collections view, which displays slightly larger thumbnails, organized by a certain place or date range. Tap once more on a collection, and you zoom into Moments, which offers full thumbnails from a specific place or time.
If you tap instead on the headers for Years, Collections, or Moments, you’ll open a map that displays groups of photos over the places where you took them; tap the group to view those pictures in thumbnail view.
As you go deeper into your photos timeline—drop from Years down to Collections, or from Collections to Moments—it offers you more-detailed ways to view groups of photos, but it doesn’t restrict you from viewing a group that’s outside the Moment you dropped into. For example, you can look at pictures from 2012 by quickly scrolling backward in time in Moments view, but it may take longer than if you scrolled in Years or Collections view to find it. And Photos view includes all your images—those from the Camera Roll and those you’ve uploaded from iTunes.
To view a single image, tap its thumbnail in Moments view. By default, the image displays on a white background, with the Edit and Share buttons visible; tap the photo once more to dismiss those controls, and the background fades to black for easier viewing.
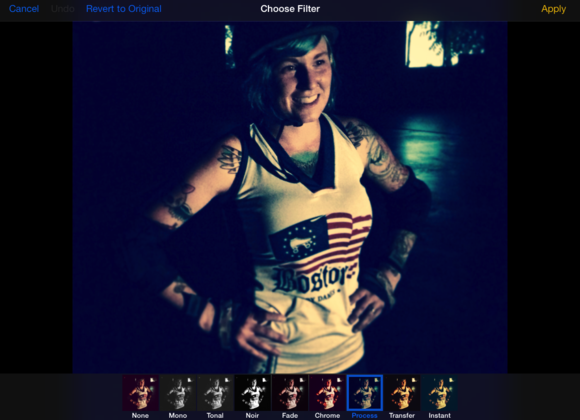
Though they have different icons, your editing controls for an image are similar to options found in iOS 6, with one exception: filters. Tap the triple-circle icon in the center of the editing pane, and you can add one of several filters to your image: Mono, Tonal, Noir, Fade, Chrome, Process, Transfer, or Instant. (To apply filters from the Photos app, you need an iPhone 4 or later, third-generation iPad or later, or fifth-generation iPod touch or later.)
To share an image, tap the Share button. You’ll see many of the same sharing features available to you in the previous operating system, but also a few new ones—the option to create an image slideshow, for example, has moved to the Share sheet.
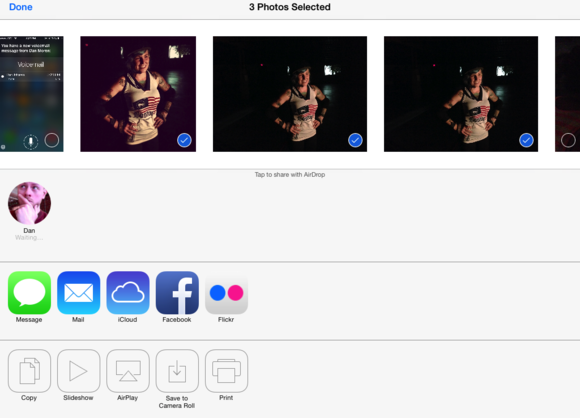
You can also scroll through and select additional photos in the timeline, if you decide you want to share multiple images. iOS 7’s AirDrop sharing technology is built into the Photos share sheet, allowing you to send your image to a nearby friend; you can additionally upload it to Flickr or iCloud (iCloud replaces iOS 6’s Photo Stream option).
Shared
Speaking of iCloud and Photo Stream, Apple has renamed the Shared Photo Streams option. Now called simply Shared Streams, it lives under the Shared tab. At the top, the tab offers a new Activity view; tap it to display any recent activity from you or your contacts on shared streams. In portrait mode, the Activity log scrolls vertically; in landscape mode, it scrolls horizontally.

In addition, the Shared tab lists the streams that you’ve shared or that others have shared with you, organized by how recently images have been added to them.
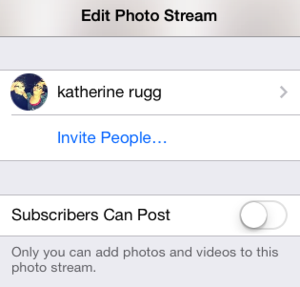
In a giant improvement over iOS 6, you can now collaborate with multiple people on Shared Streams—in other words, if you create a Shared Stream for pictures of your family reunion and invite your brother and sister to it, they can now add photos of their own rather than just viewing and commenting on your images. Of course, it’s up to the owner of the stream whether subscribers can only view pictures or can post images of their own.
When you tap an individual stream, you see thumbnails of all the images in that group, along with an option to select photos to share or save to your device. If you’re allowed to add images to the stream, a plus button (+) thumbnail appears at the bottom of the group; tap it to add new images from your library. Below the thumbnails is a count of the current number of photos in the stream, along with who originally shared it.
At the bottom of the screen on an iPhone or iPod touch (top right corner on an iPad), you can open the People pane; it lets you see who the owner of the stream is, along with subscribers and their iCloud contact information (or full contact card, if they’re in your address book). There’s also an option to share the link to the stream online (if enabled), enable or disable notifications, or unsubscribe from the stream. If you own the stream, there’s also a button to invite more people to view or collaborate, a toggle for whether subscribers can post, a toggle for enabling a public website version of the stream, and a button to delete the stream.
Albums
The final—and most traditional—view in the Photos app, the Albums tab has changed relatively little beyond its basic appearance. As mentioned earlier, Faces and Events now live in this tab, as does your Photo Stream archive.
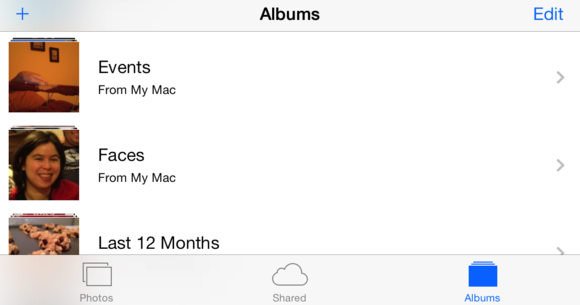
In addition, the Photo Library album has been eliminated, and there are two new smart albums for your perusal: Videos and Panoramas. And in case you’re curious about which photo albums originated on your device, any Mac-synced album now has ‘from My Mac’ below its name.
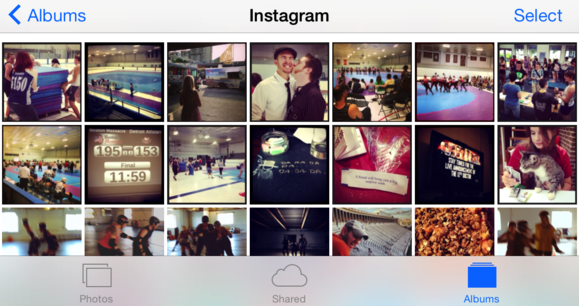
Your Camera Roll sits at the top of the Albums screen, as always, with any new snapshot or video you take included in the album. New in iOS 7, however, is special treatment of photos exported from a third-party app such as Instagram: In the past, taking or editing a photo in a third-party app and saving it to your Camera Roll sent the image to the Camera Roll album. Now, not only does the picture appear in your Camera Roll album, it also shows up in an album named after the app. If you take a snapshot and post it to Instagram, for example, that image saves to both your Camera Roll and the Instagram album in the Albums tab.
One omission in iOS 7: The Select All Photos option, which used to appear when you added photos to a new or existing iPhone-created album, seems to have vanished, forcing you to manually select each and every photo you want to include. (If you’re adding images from the Photos tab, you can use the tiny Select button that shows up next to Moments, but there’s no way to add all images from the Album tab.)
Author: Serenity Caldwell, Associate Editor

Serenity has been writing and talking and tinkering with Apple products since she was old enough to double-click. In her spare time, she sketches, writes, acts, sings, and wears an assortment of hats.