

Dutch 3D printer company Ultimaker BV has earned a reputation in the user community for building high-quality machines that produce highly accurate prints. With a price of $3,495 (through resellers), the Ultimaker 3 is aimed squarely at professionals and prosumers for rapid prototyping of both complex geometries (precision builds) and the use of multiple, industrial-grade polymer materials.
At virtually any 3D printer conference, Ultimaker machines can be found on the exhibit floor being used by third-party service providers to demo their printable wares. Asked what they liked about the machines, users typically say they are easy to use and accurate.
 Lucas Mearian/IDG
 The Ultimaker 3 building the Eiffel Tower and its scaffolding support.
Online user community 3D Hubs has consistently rated Ultimaker printers among the very best over the past three years, and its review of the Ultimaker 2+, which included input from 89 users, placed that printer as the best in the "Prosumer" category.
As a company, Ultimaker is among the top providers of "low-cost" desktop 3D printers, according to Terry Wohlers, president of industry research firm Wohler's Associates. Low cost, however, is a subjective term and the Ultimaker 3 is definitely not for beginners.
Good quality design
It comes with two print cores (extruder heads); you can use either two filament colors or use one core for build material and the other for dissolvable support material. The extruder heads can be swapped out with just a pinch of a lever, which is really convenient if you're looking to change out materials or if a print head needs replacing.
 Ultimaker
 Swapping out the Ultimaker 3's print heads is as easy as simply pinching two levers together.
The primary print core can be used for printing with a wide range of materials, including PLA, ABS, CPE and nylon. While PLA and ABS are common thermoplastics for 3D printing, materials such as CPE (chlorinated polyethylene) and nylon are rarer. CPE is a flexible polymer with good UV and chemical resistance, a high tear strength and fire resistance. Nylon is both slick and bendable -- great for making flexible objects such as tubing or casings.
The support print core can be used for PVA material. In order to use different polymers, the temperature settings on the print cores must be adjusted through the onboard LED menu.
 Ultimaker
 The Ultimaker 3 can support one filament or two, which are fed through two separate print heads. The material is recognized by the printer through an NFC chip embedded in the spool.
The machine offers outstanding print resolution, anywhere from 20 to 200 microns. By comparison, the last printer I reviewed was the Makerbot Replicator+, which sells for about $2,500 (Amazon price) and offers a 100- to 400-micron resolution range.
This hotspot-enabled 3D printer lets you remotely monitor print jobs with an onboard camera that feeds images through a Wi-Fi link, and you can connect a laptop or desktop computer to it using Wi-Fi or Ethernet. It also comes with a USB port, from which you can print models via files stored on a thumb drive.
The Ultimaker 3 is a good size for desktop use. It measures 13.5 x 15 x 15.25 in., weighs 23 lbs. and has a moderately good build volume: 8.5 x 8.5 x 7.9 in. (or 7.8 x 8.5 x 7.9 in. when in dual-extruder mode).
Ultimaker also provides a handy online manual for unboxing and setting up the printer and for troubleshooting issues.
More options, more complexity
Because the Ultimaker 3 offers dual extrusion of filaments, the machine's initial setup is a bit more complex. However, the machine's LED screen and selector knob guides a user effortlessly through placing the two print heads in the extruder assembly and loading filament.
I had the printer set up in about 25 minutes.
Straight out of the gate, however, I ran into an issue. While trying to print a model of the Eiffel Tower, the Ultimaker threw an error message telling me there was a problem with the "active level sensor," which relates to achieving a balanced distance from the print head to the build plate.
I used the machine's automated active leveling function via the main LED menu and was off and printing. (I later ran into more leveling issues; more about that below.)
Ultimaker uses a free, open-source software called Cura to prepare your model for 3D printing. Cura software is also used by other 3D printer makers, such as Lulzbot and Prusa.
For novices, Cura makes it easy to get great results, and for experts there are over 200 settings to adjust a job to your needs.
I've found the Cura software, including Ultimaker's flavor, relatively intuitive, though not as easy to navigate as other slicer software I've used. Ultimaker, however, offers a plethora of online information in user manuals for both the printer and its software that will answer any questions a maker may have. I found the user manuals both detailed and simple to understand.
Most importantly, Cura is one of the most powerful slicing/CAD applications available; it allows a maker to easily manipulate a print job -- both in positioning and sizing -- and allows you to break down a model into its individual layers and to see it transparently (X-ray mode) to ensure accurate and solid builds.
 Lucas Mearian/IDG
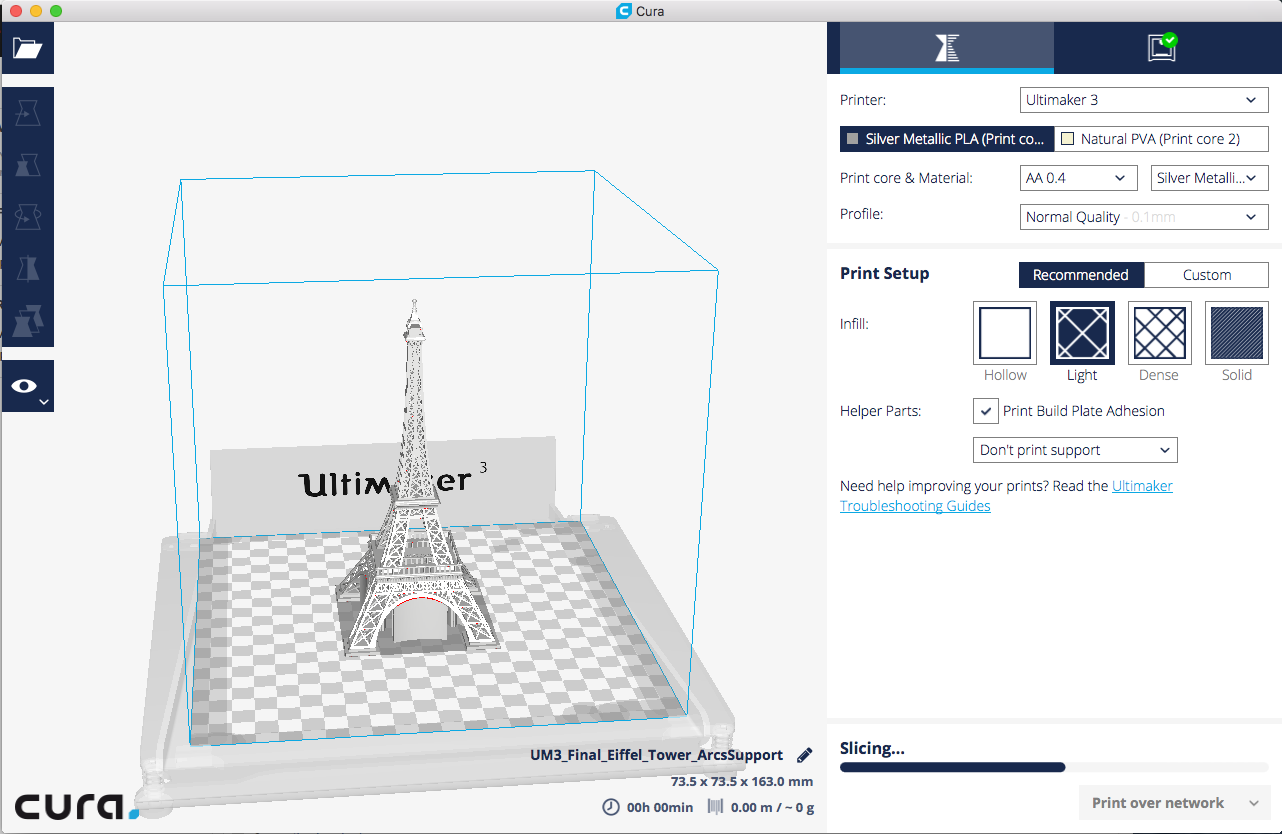
 The Eiffel Tower as it appears in the Cura slicing software.
My review unit came with PLA (polylactic acid, the most popular plastic for 3D printers) and PVA (polyvinyl alcohol), a material that has had more limited use in consumer 3D printers.
Most 3D printers operate with one material at a time, but a growing number of material extrusion machines use a second one for support structures, which is later removed, Wohlers said.
The Cura software offers polymer material profiles specifically developed for Ultimaker hardware and designed to help ensure the best printing results.
Although the Ultimaker 3 has an open material system, it recommends the use of Ultimaker material. The printer has a near-field communication chip reader that will identify Ultimaker material spools and transfers the information to Ultimaker's Cura slicing/CAD software when connected via the network. This way, Cura will automatically select the right material for each print core.
The build plate is critical
Print job adhesion to a build plate is a critical factor in choosing a 3D printer. If the model you're building detaches from the print plate while the job is in progress, the build is ruined. If build jobs stick too firmly, detaching them can cause damage. You want a build plate that enables good attachment/detachment.
The Ultimaker 3 printer has a glass build plate that's heated to ensure proper adhesion, but because it's glass, it also offers easy detachment. Just in case, though, Ultimaker includes a glue stick to help with adhesion. (That's not uncommon with 3D printers.)
While I had models detach from the build plate on two print jobs, for most of my projects, they adhered and detached well.
Print speed and quality
The best two words to describe the Ultimaker 3's printing are methodical and meticulous.
My go-to print for reviews is a 6.5-in. tall Eiffel Tower, an extremely detailed model with intricate scaffolding and even pedestrian handrails for the catwalk on the tower. The Ultimaker 3 produced the best Eiffel Tower model I've ever printed on a fused deposition modeling (FDM) printer; apart from a few stray filament stubs on the edges that could be sanded or snipped clean, the model was nearly flawless -- a rare thing indeed. The printer also produce a beautifully thin raft on the base of the model and under arch support that peeled away with ease.
Other machines, however -- no matter how finely you choose the layer thicknesses or resolution -- struggled to come anywhere close to the Ultimaker 3's accuracy and resolution.
However, watching the Ultimaker 3 print was excruciating; it felt like each layer was being carefully contemplated before being laid down. The model took nearly 19 hours to print, which is more than triple the amount of time other printers have taken to produce the same tower.
 Lucas Mearian/IDG
 The Eiffel Tower on the left was printed by the Ultimaker 3; the one on the right by the MakerBot Replicator+. The Ultimaker 3 created the best quality Eiffel Tower of all the fused filament fabrication machines Computerworld has tested to date.
For example, the Makerbot Replicator+ was able to print the same Eiffel Tower model in one hour and 50 minutes. We're talking about a massive difference in speed. Even one of the most accurate 3D printers I'd previously tested -- the $1,250 Lulzbot Mini -- produced a smaller version of the Eiffel Tower with good quality and did it much faster.
So I'm a bit torn. Is speed as important as print quality? You'll have to decide.
Reasons for those results
According to an Ultimaker technical support engineer, the default settings in the Cura software indeed lead to a great print quality, but were chosen as the safest settings. That means print time can be quite long.
"This is mainly the case for prints using PVA supports. Once you have gotten used to working with Cura, you can experiment with some of the custom settings, to reduce the print time," the Ultimaker technician said to Computerworld via email.
So for my next print job, I reset the Cura software for a "fast print," which adjusts the layer thickness to speed things up.
I chose to print a chess rook with a spiral design that would also test the machine's ability to reproduce challenging geometries. The chess piece not only has an outer spiral design but contains a double-helix and an internal spiral staircase. It's a great piece for testing accuracy. Again, the Ultimaker 3's print job was flawless -- the best I've seen.
 Lucas Mearian/IDG
 The Ultimaker 3 did an exemplary job of producing this spiral-design chess rook, which included an internal spiral staircase and double helix.
The Cura software estimated build time for the 2-in.-tall spiral chess piece to be one hour and 39 minutes; the actual build time was two hours and 10 minutes. Still slow, but far better than when the machine was set at the 1mm resolution.
Next, I tested the machine's ability to print multiple models at the same time by choosing a set of four Pokemon-style chess pieces that also tests how well relatively average details are replicated.
 Lucas Mearian/IDG
 The two Pokemon-style chess pieces on the left were printed by the Ultimaker 3; the ones on the right by the MakerBot Replicator +. Notice the surface of the pieces on the left is more smooth, indicative of the Ultimaker's higher resolution.
The set took a whopping seven hours and 35 minutes to print. By comparison, the Makerbot Replicator+ did the same four chess pieces in one hour and 50 minutes.
A fussy machine
As I tried to move to bigger print jobs, I had increasing trouble with the machine's auto-leveling function. The error message repeatedly indicated a problem with the active level sensor, which automatically levels the print bed height and controls the tilt/skew calibration. (The Ultimaker 2 required manual leveling.)
If a printer cannot perform the leveling function, it won't print. For virtually every print job, I had to address the active leveling sensor issue, usually by manually leveling the print bed. If it still wouldn't print, I reset the Cura software to the default settings, which seemed to solve the issue for that print job. Eventually, the issue surfaced again, and this time would not go away no matter what.
This recurring issue is not something I've experienced with most other printers, and it cut short my ability to try this 3D printer with all the various models I typically print.
Another issue I had involved loading filament. The Ultimaker 3, like its predecessor, had a tendency to crush the filament, at least on the first load attempt. I was able to get it to load properly on the second try and had no further loading issues. But it was an indicator that users could run into problems.
Another shortcoming of the Ultimaker 3 is the onboard LED menu. While there's a "return" function on the menu that allows you to go back to the last menu item you were using, there's no "home" or "main menu" option. I feel a machine should always allow you to return to the main menu so you can start a process over quickly.
Bottom line
The Ultimaker 3 is priced nearly $1,000 more than the Ultimaker 2+. For that kind of money, you should expect a lot of amenities -- and being able to print with a variety of dual materials is certainly a big one.
This printer is by far the most accurate fused filament fabrication machine I've tested. While a comparable stereolithography (liquid polymer) 3D printer -- such as the Formlabs Form 1+, which sells for $1,826 (Amazon price) -- will do a better job at creating accurate models, it can also be messier, and you cannot print with more than one material at a time.
I'd like to recommend this 3D printer on quality of results, despite the issues I ran into. There's always the chance that the unit I received was a lemon in need of tweaks. If Ultimaker can work on its reliability issues, I would heartily recommend it for prosumers and small businesses that need an accurate 3D printer for rapid prototyping. But the problems I had with auto-leveling and various other issues stop me from doing so.


