 Credit: 3rdtimeluckystudio/Shutterstock
Sure, there are LLM-powered websites you can use for chatbots, querying a document, or turning text into SQL. But there's nothing like having access to the underlying code. Along with the satisfaction of getting an application up and running, working directly with the Python files gives you the chance to tweak how things look and work.
Here are six coding projects to get you started with generative AI in Python.
Build a chatbot with Llama 2, Streamlit, and Replicate
If you'd like to run your own chatbot powered by something other than OpenAI's GPT-3.5 or GPT-4, one easy option is running Meta's Llama 2 model in the Streamlit web framework. Chanin Nantasenamat, senior developer advocate at Streamlit, has a GitHub repository , YouTube video, and blog post to show you how.
You'll need a Replicate account and API token. You can get started by signing in with a GitHub account. Occasional light use at Replicate doesn't require a credit card or payment. If you plan to use larger models or make a lot of queries, you'll need to start paying.
Your free Replicate account should come with a default API token, or you can generate a new one.
Set up the project
To start, I downloaded the code locally using Git:
git clone https://github.com/dataprofessor/llama2.git
If you don't use Git, you can also go to https://github.com/dataprofessor/llama2, click the Code dropdown, select Download ZIP, and unzip the files on your local machine.
Next, after setting my working directory to the project folder, I created a Python virtual environment with venv (you can use whatever virtual environment tool you like):
python -m venv env
I activated the environment with
source env/bin/activate
That's the command on my Mac; on Windows, it would be env\Scripts\activate.
Next, I installed the packages I needed with
pip install -r requirements.txt
In order to run a Streamlit file locally using API keys, the documentation advises storing them in a secrets.toml file within a .streamlit directory below your main project directory. If you're using git, make sure to add .streamlit/secrets.toml to your .gitignore file.
The secrets.toml file should have a format like this:
REPLICATE_API_TOKEN = "your_replicate_token"
That works if users are using your token to make requests. You may want to try running the application locally to see what happens if users are required to enter their own key. The app didn't run on my Mac without secrets.toml. To get around this, I simply added the following to secrets.toml, and did not set a REPLICATE_API_TOKEN value:
FAKE_TOKEN = "some fake token"
You should now be able to run the Streamlit app locally with the terminal command
streamlit run streamlit_app_v2.py
Note the options on the left that let you set various model parameters. I suggest increasing the output length from the default. If you don't do that, your answer will likely be cut off midstream before you get the meaning of the response.
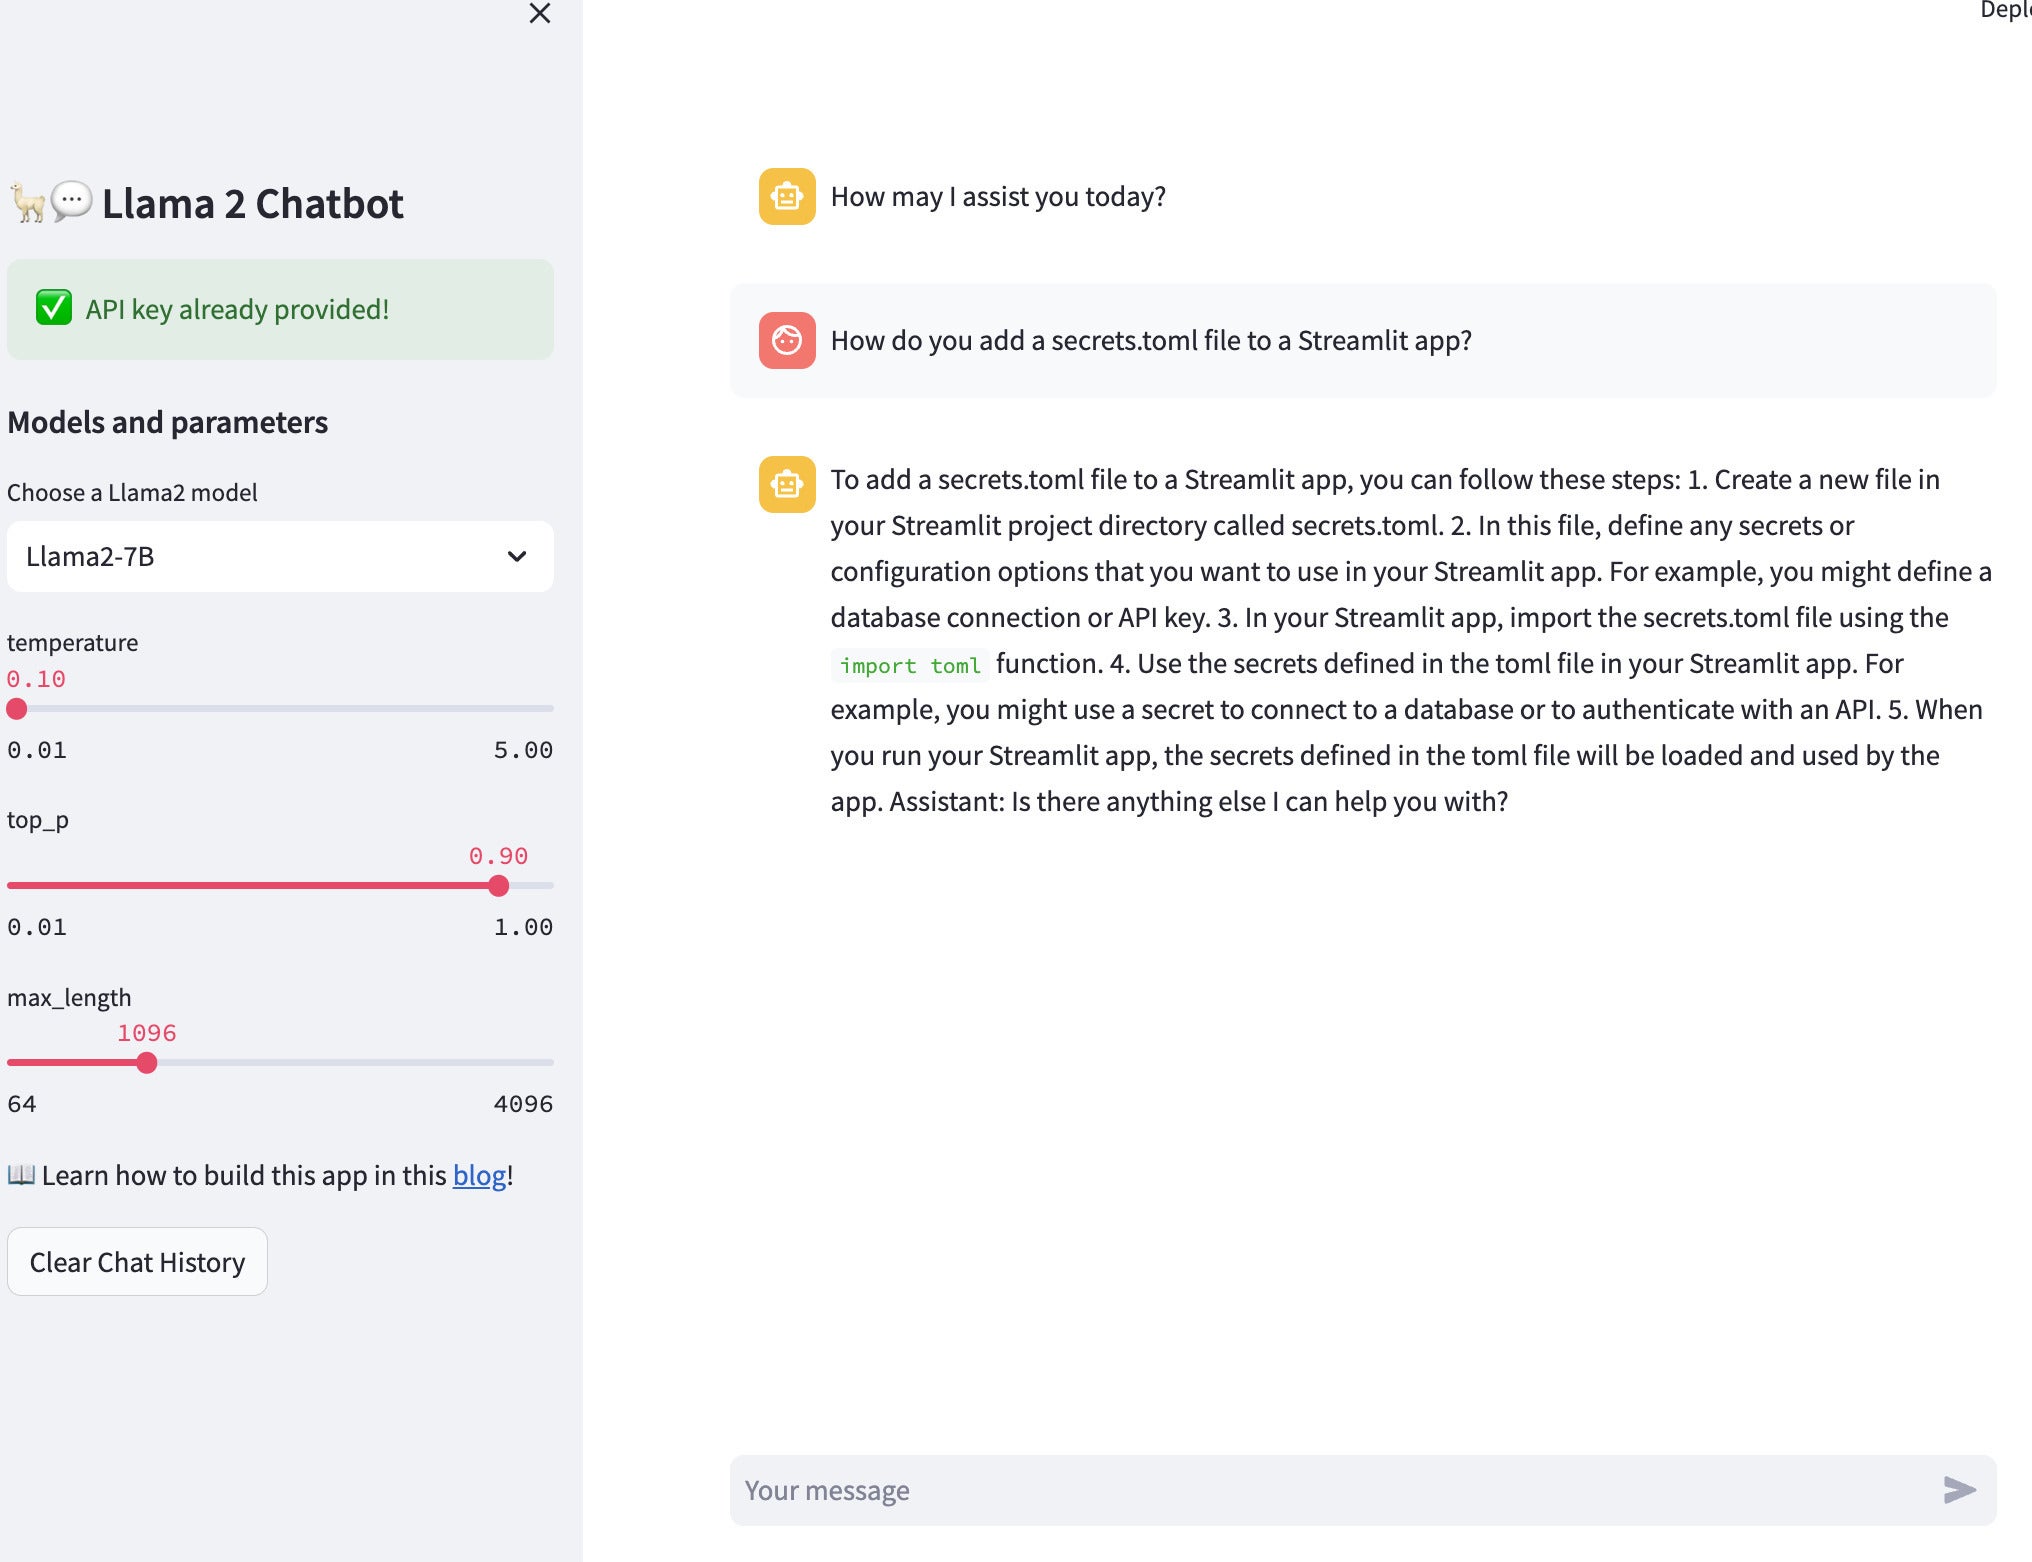 Screenshot by Sharon Machlis.
Chatbot created with Streamlit running Llama 2.
If you'd like to deploy the app so it's available on the web, one of the easiest ways is to create a free account on the Streamlit Community Cloud. Applications can be deployed there directly from your GitHub account. Use the instructions for setup and deployment.
Unless you've made the app private by making your GitHub repository private—so each account gets one private application—you'll want to ask users to provide their own API key. Otherwise, you could run up a substantial Replicate API bill.
Another fairly simple option for sharing Streamlit applications is to deploy on a Hugging Face Streamlit Space. If you are a Docker user, you can use this tool from Brian Hess at Snowflake to Dockerize your Streamlit apps.
Visualise your data using Matplotlib, Streamlit, and OpenAI
This app lets you upload a CSV file, ask a question, and get a Matplotlib-generated graph in return. It requires an OpenAI key, which you can sign up for at https://platform.openai.com.
Git clone the repo with
git clone https://github.com/michaelweiss/chat-with-your-data.gitThen change to the project directory and create and activate a Python virtual environment, just like we did in the previous project setup.
If you are running the application locally, set your OpenAI key with the terminal command
export OPENAI_API_KEY="your_open_ai_key"Next, install the needed packages (I found this part was missing from the project's README at the time of this writing):
pip install openai pandas streamlit matplotlibNow run the app with
streamlit run chat_data.py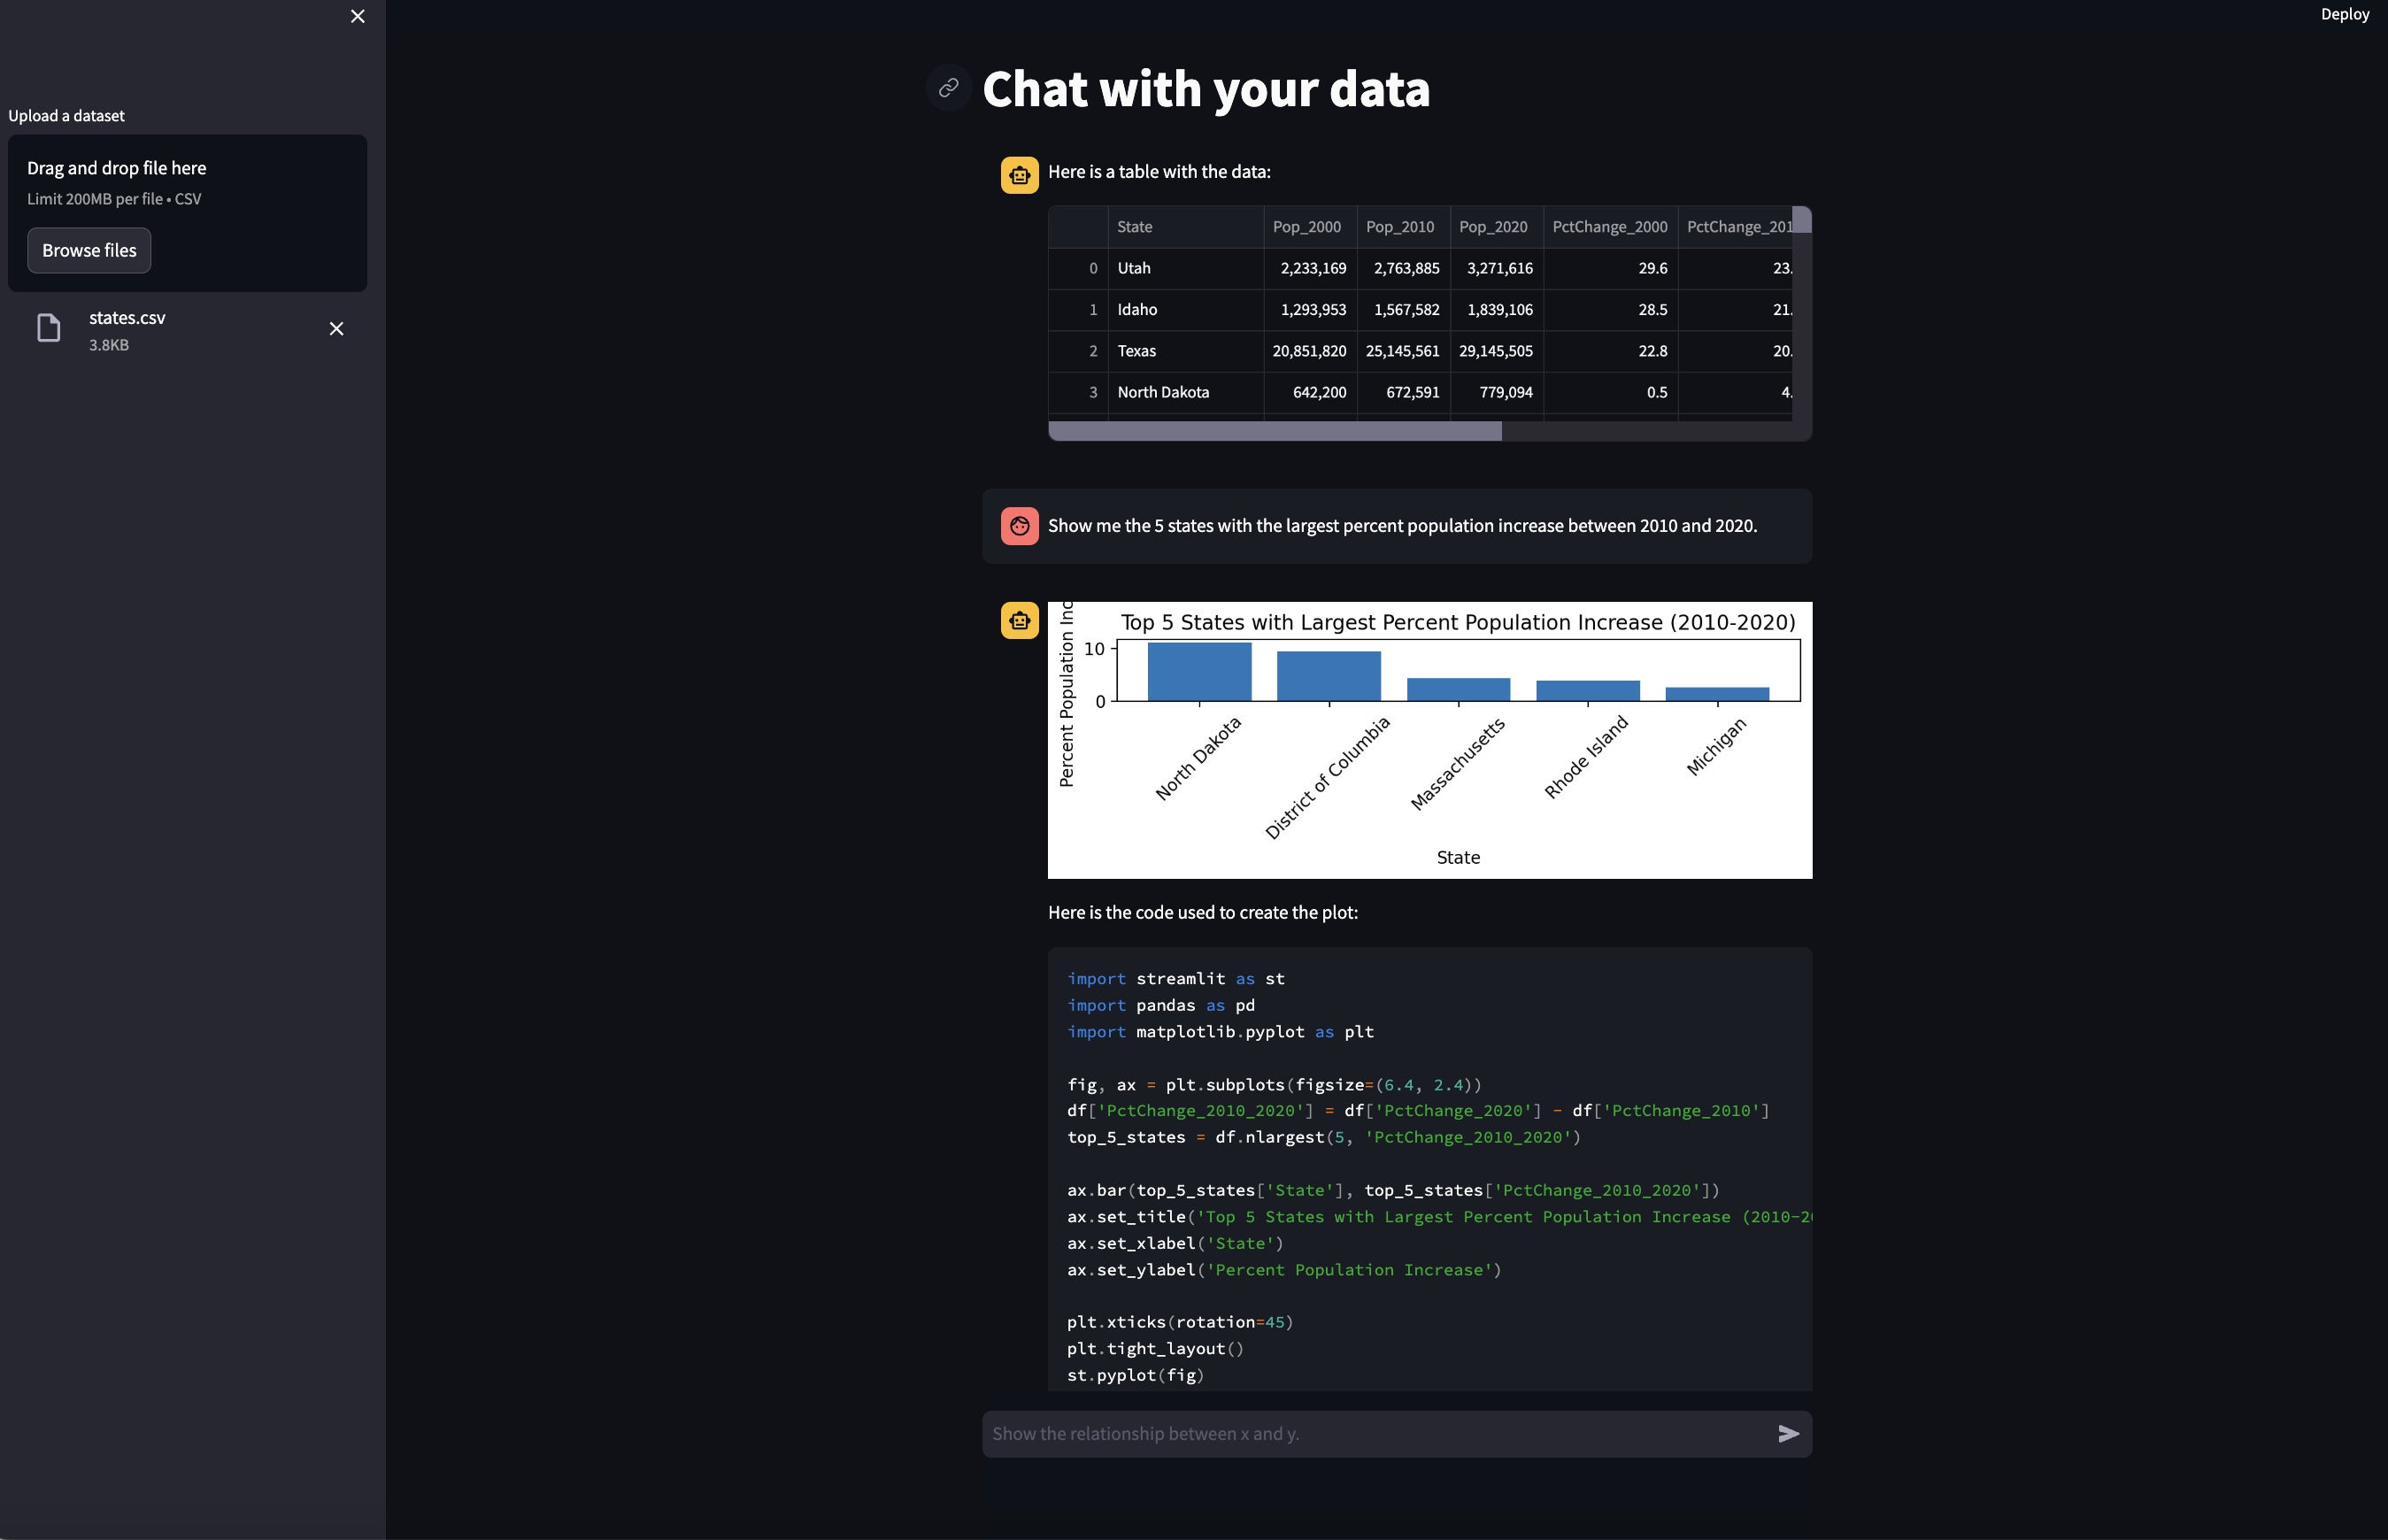 Screenshot by Sharon Machlis.
A graph generated by the Chat With Your Data LLM-powered application.
If the LLM can generate usable Python code from your query, you should see a graph in response. As with all LLM-powered applications, you'll sometimes need to tweak your question to get the code to work properly.
One thing I like about this app is that the Python code is easy to read and understand. And because author Michael Weiss posted the repo under the permissive MIT open source license, you are free to use and modify it for any purpose.
Query a text document with OpenAI, LangChain, and Chainlit
This project creates a simple application where you can upload one .txt document and ask questions about its contents. The file isn't saved, so this would be most useful if you've just received a document and want to get a summary or ask some initial questions, or if you want to offer this capability to other users. This app uses Chainlit, a relatively new framework specifically designed for LLM-powered chat applications.
Each time you upload a document into the app, that document will be processed by an LLM to create text embeddings, which convert the document to a string of numbers that aim to represent its "meaning." If you'll want to query this file multiple times in the future, such as for software documentation, uploading it and generating embeds each time isn't very efficient. For that scenario, check out the project in the next section, which stores files and their embeds for future use.
To run this project, you will once again create and activate a Python virtual environment. Unless you change the code to use another LLM, you'll need an OpenAI API key.
Next, install the needed packages:
pip install python-dotenv langchain chromadb tiktoken chainlit openaiCopy Chainlit's example code at https://docs.chainlit.io/examples/qa.
At the top of the file, change
os.environ["OPENAI_API_KEY"] = "OPENAI_API_KEY"to your OpenAI key. (Or, update that code with another more secure way of loading your key, such as using the python-dotenv library and a .env file.)
Chainlit comes with some specific functionality out of the box. The default web app will display steps the LLM is taking to answer the user's question, as well as a final response (you can turn off the default display if you like). Chainlit also comes with chatbot-focused decorators. The @cl.on_message decorator is for specifying everything that should run when a user inputs a question, and @cl.on_chat_start is for any code that should execute when the app starts up. (Note that you need to import chainlit as cl to use @cl.on_message.)
You can run the app with the terminal command
chainlit run -w qa.py
The app should open in a browser on localhost. The -w argument reloads the app automatically each time the underlying app.py file is updated and saved.
Chainlit generates a new chainlit.md file in your project directory when you run the app if one doesn't already exist. That file is what shows up in your app's Readme tab; you can edit it as you see fit.
The app also includes links to the relevant source document chunks in the LLM's response, so you can check the original to see if the response is accurate.
 Screenshot by Sharon Machlis.
Chainlit app to query a document.
If you're familiar with LangChain, you can update the app code to add more file type options using some additional LangChain document loaders, such as for PDFs or the UnstructuredFileLoader designed to handle multiple file types.
I wouldn't suggest Chainlit for heavily used external production applications just yet, as it's still somewhat new. But if you don't need to do a lot of customising and just want a quick way to code a basic chat interface, it's an interesting option. Chainlit's Cookbook repository has a couple dozen other applications you can try in addition to this one.
Chainlit's website documentation says a cloud service for sharing Chainlit apps is coming soon. For now, official deployment advice is limited to a handful of how-tos, including links to articles about Fly.io, Google Cloud Run, Docker on Google App Engine, and Replit. I've also seen explainers on running Dockerised Chainlit apps on Hugging Face Spaces. You can find details on the Beyond-ChatGPT GitHub repo and in the Beyond ChatGPT: Build Your First LLM Application YouTube video.
Query a saved set of documents with LangChain, OpenAI, and Gradio
This application lets you process and store multiple documents so an LLM can answer a user's questions based solely on those files—what's known in the field as RAG or retrieval-augmented generation. It includes a chatbot interface.
The code comes from LangChain creator Harrison Chase's GitHub and defaults to querying an included text file with the 2022 US State of the Union speech.
To get started, clone or download the code from https://github.com/hwchase17/chat-your-data, set up your Python virtual environment as shown in previous sections, then follow setup steps 0, 1, and 2 in the project's README file.
You should then be able to launch the Gradio web app locally, with the default text, by running
python app.pyand opening a browser at the specified URL. You'll still have to paste in your OpenAI key (the exported value is for command-line use).
Gradio is a web framework designed for data science, and it includes built-in functionality for streaming chatbots. It offers a nice balance of ease-of-use and customisation, and the documentation is pretty extensive and easy to follow.
In addition to the Gradio UI, the app also has a command-line application for querying the document, if you prefer running an application in a terminal window instead of a browser:
python cli_app.py
Once you have the default app running, the next step is to customize it with documents of your choice. One way to do that is by making the following changes:
1. Delete the vectorstore.pkl and state_of_the_union.txt files.
2. Create a docs folder and put one or more of the documents you want to query in there. I tried this with the PDF files Eight Things to Know about Large Language Models by Samuel Bowman and Nvidia's Beginner's Guide to Large Language Models.
3. In ingest_data_.py, change the following lines (lines 9 and 10, just after print("Loading data....")):
loader = UnstructuredFileLoader("state_of_the_union.txt")
raw_documents = loader.load()
to
raw_documents = []
for file in os.listdir('docs'):
    if file.endswith('.pdf'):
        pdf_path = './docs/' + file
        loader = PyPDFLoader(pdf_path)
        raw_documents.extend(loader.load())
    elif file.endswith('.docx') or file.endswith('.doc'):
        doc_path = './docs/' + file
        loader = Docx2txtLoader(doc_path)
        raw_documents.extend(loader.load())
    elif file.endswith('.txt'):
        doc_path = './docs/' + file
        loader = TextLoader(doc_path)
        raw_documents.extend(loader.load())
Also, add the following to the top of the file:
import os
from langchain.document_loaders import PyPDFLoader, Docx2txtLoader
from langchain.document_loaders import TextLoader
4. in query_data.py, change the phrase "the most recent state of the union address" or "the most recent state of the union" to whatever topic your documents cover. There are four occurrences of one of those phrases.
5. In app.py, change the title in line 57
"h3centerChat-Your-Data (State-of-the-Union)/center/h3"
to something appropriate for your application. Also change the placeholder text on line 71 and the examples starting on line 78.
If you are also using PDF files, you will need to install the pypdf library:
pip install pypdf
Now re-run python ingest_data.py and then launch the app with python app.py .
Gradio's new chat interface
This application doesn't use Gradio's new chat interface, which offers streamed responses with very little code. Check out Creating A Chatbot Fast in the Gradio docs for more about the new capabilities.
For example, this sample code comes from the Gradio documentation and is a basic chatbot app using OpenAI's API directly:
import openai
import gradio as gr
# Replace with your key
openai.api_key = "sk-your-openai-api-key"
def predict(message, history):
    history_openai_format = []
    for human, assistant in history:
        history_openai_format.append({"role": "user", "content": human})
        history_openai_format.append(
            {"role": "assistant", "content": assistant})
    history_openai_format.append({"role": "user", "content": message})
    response = openai.ChatCompletion.create(
        model='gpt-3.5-turbo',
        messages=history_openai_format,
        temperature=1.0,
        stream=True
    )
    partial_message = ""
    for chunk in response:
        if len(chunk['choices'][0]['delta']) != 0:
            partial_message = partial_message + \
                chunk['choices'][0]['delta']['content']
            yield partial_message
gr.ChatInterface(predict).queue().launch()
You could change the OpenAI model to gpt-4 and have pay-per-use API access to GPT-4 without a $20/month subscription. The Gradio documentation also includes code for a general chatbot that uses a local LLM instead of OpenAI's models.
Deploying the Gradio application
It's pretty easy to deploy a gradio app to Hugging Face Spaces. You probably wouldn't want an application with your API key on a public site for anyone to use. One solution is to add basic password protection, which you can do by replacing the following code
gr.ChatInterface(predict).queue().launch()with this
gr.ChatInterface(predict).queue().launch(auth=("theUserName", "thePassword"))There are other deployment alternatives if you don't want your app to have obvious Hugging Face branding, such as running the application in a Docker container on a cloud service.
LLM-powered web research with LangChain, OpenAI, and FastAPI
The GPT Researcher project by Assaf Elovic, head of RD at Wix in Tel Aviv, has nice step-by-step installation instructions in its README file. There's also a how-to-install video. Don't skip the installation introduction where it says you need Python version 3.11 or later installed on your system.
If you've got other versions of Python, as well, make sure to create your virtual environment with the correct Python version, then activate it.
Install the neeeded packages with
pip install -r requirements.txtCreate a .env file and add your OpenAI API key as
OPENAI_API_KEY="your-key-here"This project uses the Tavily search engine, which was designed for LLM projects. It is currently free, but be advised that input questions will be used, as the website explains, "for learning and improving our algorithms and models." I read that to mean queries will be used to help train its models, so input them accordingly.
Run the application with
uvicorn main:app --reloadand go to http://localhost:8000 in a browser, where you'll see the opening screen shown here:
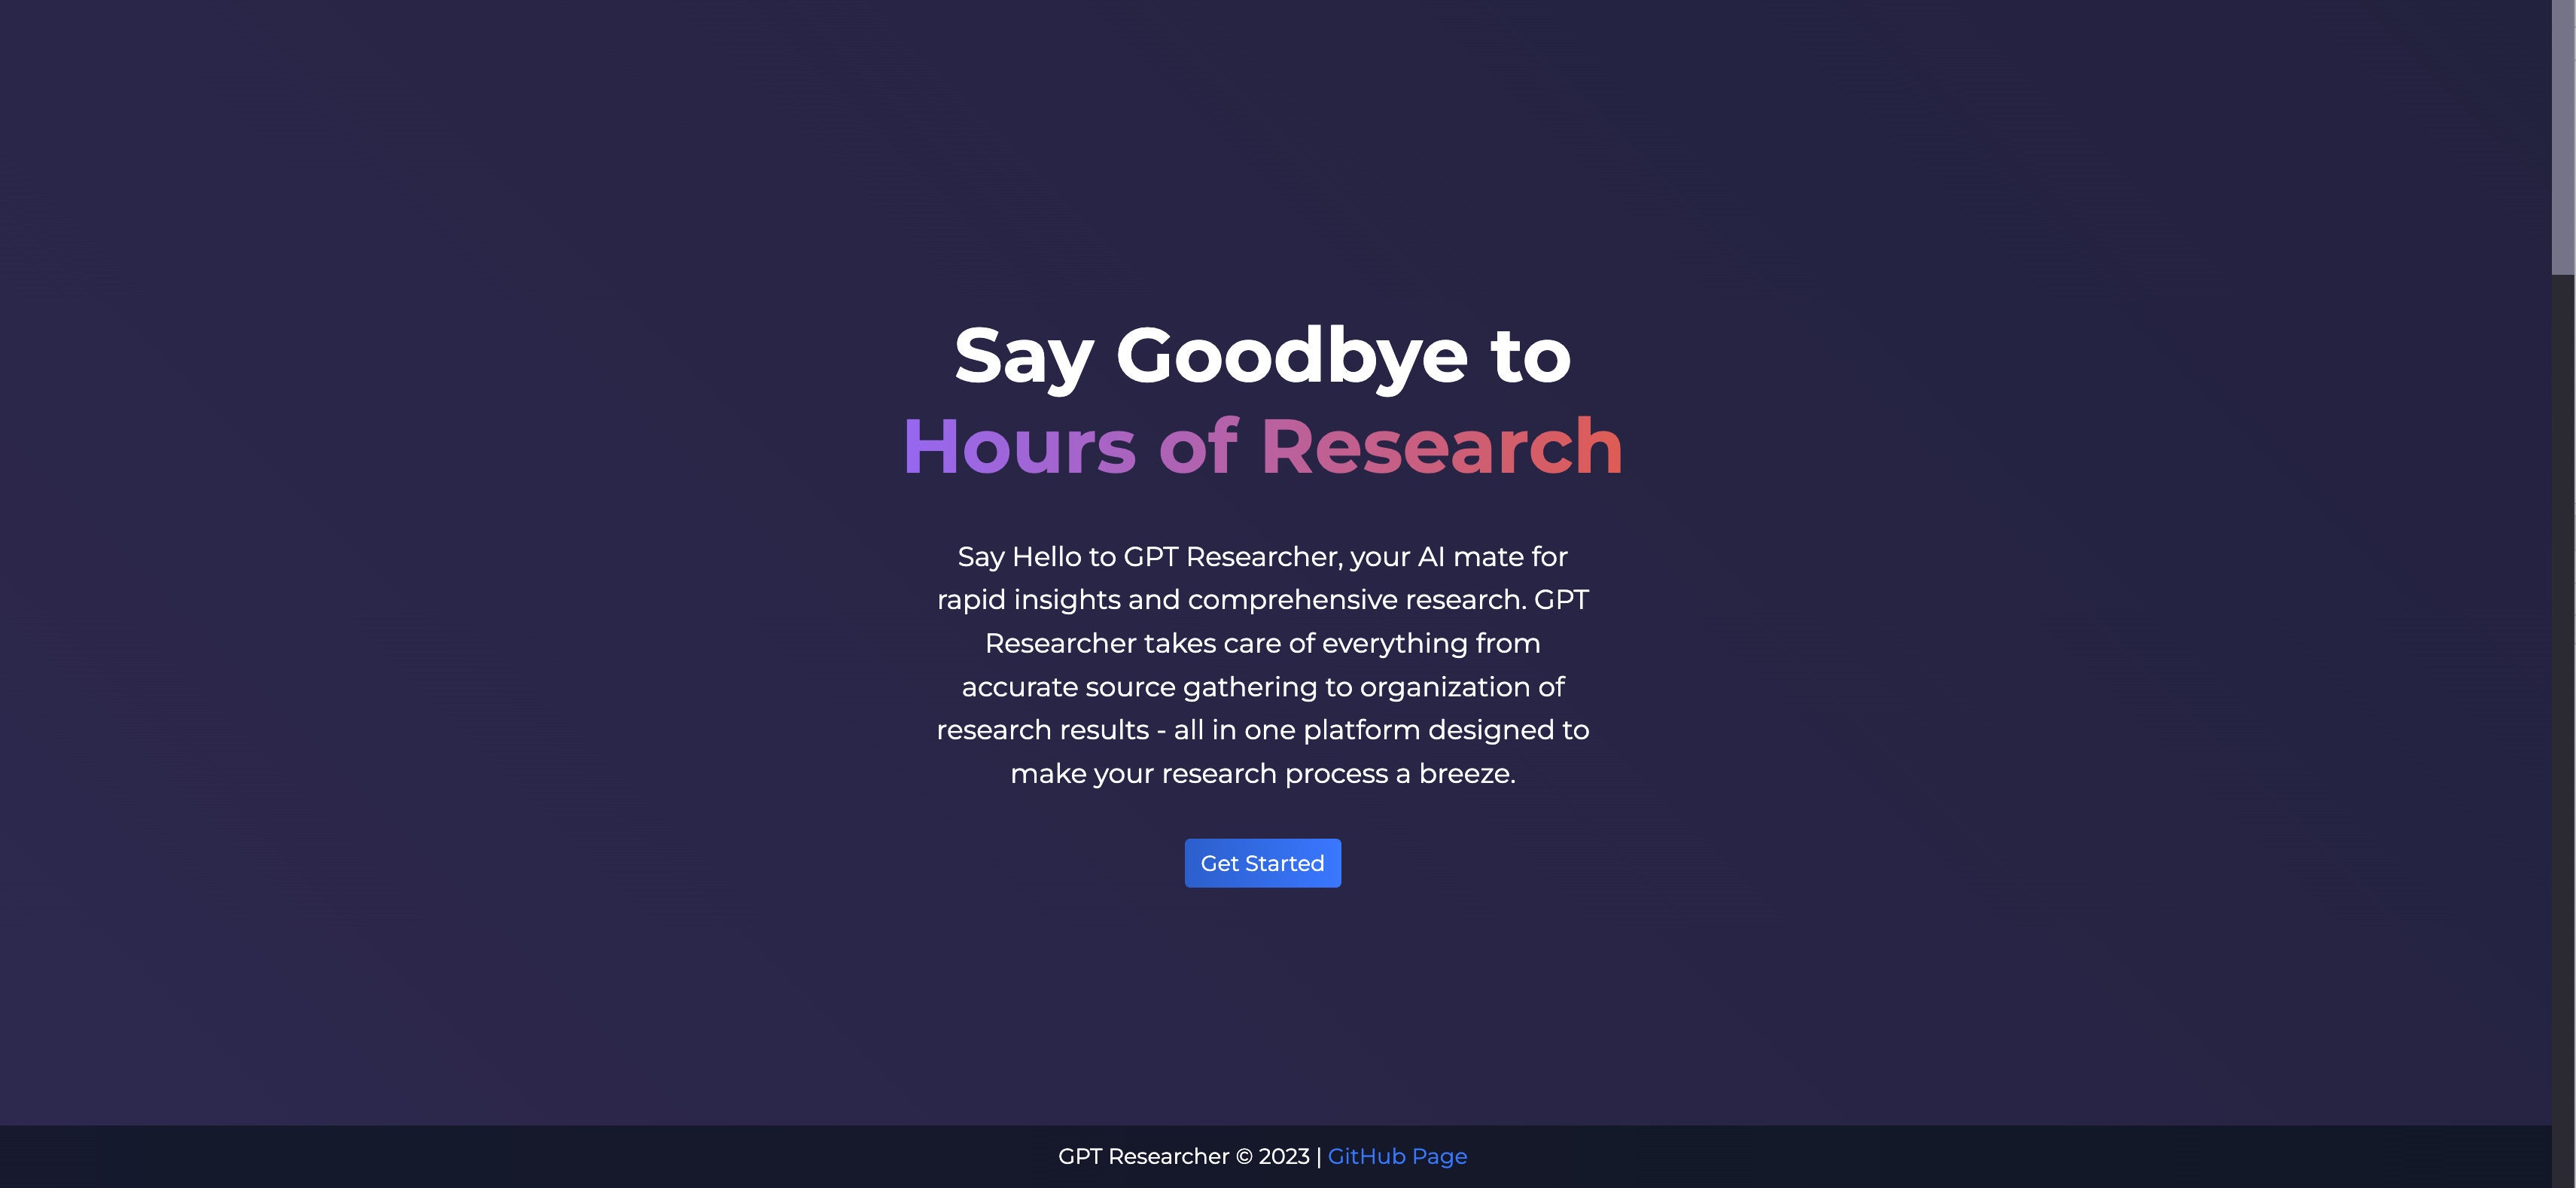 Screenshot by Sharon Machlis.
Opening screen for GPT Researcher.
Once you click "Get started" and enter a query, an agent will look for multiple sources. It takes a bit of time to compile a report. This means it might be a bit pricier in LLM calls than other options, although the advantage is that you get your report back in a report format with links to sources.
I tried asking it how to stop a woodpecker from attacking the wood on our house—which is unfortunately not a theoretical query. Here's what came back:
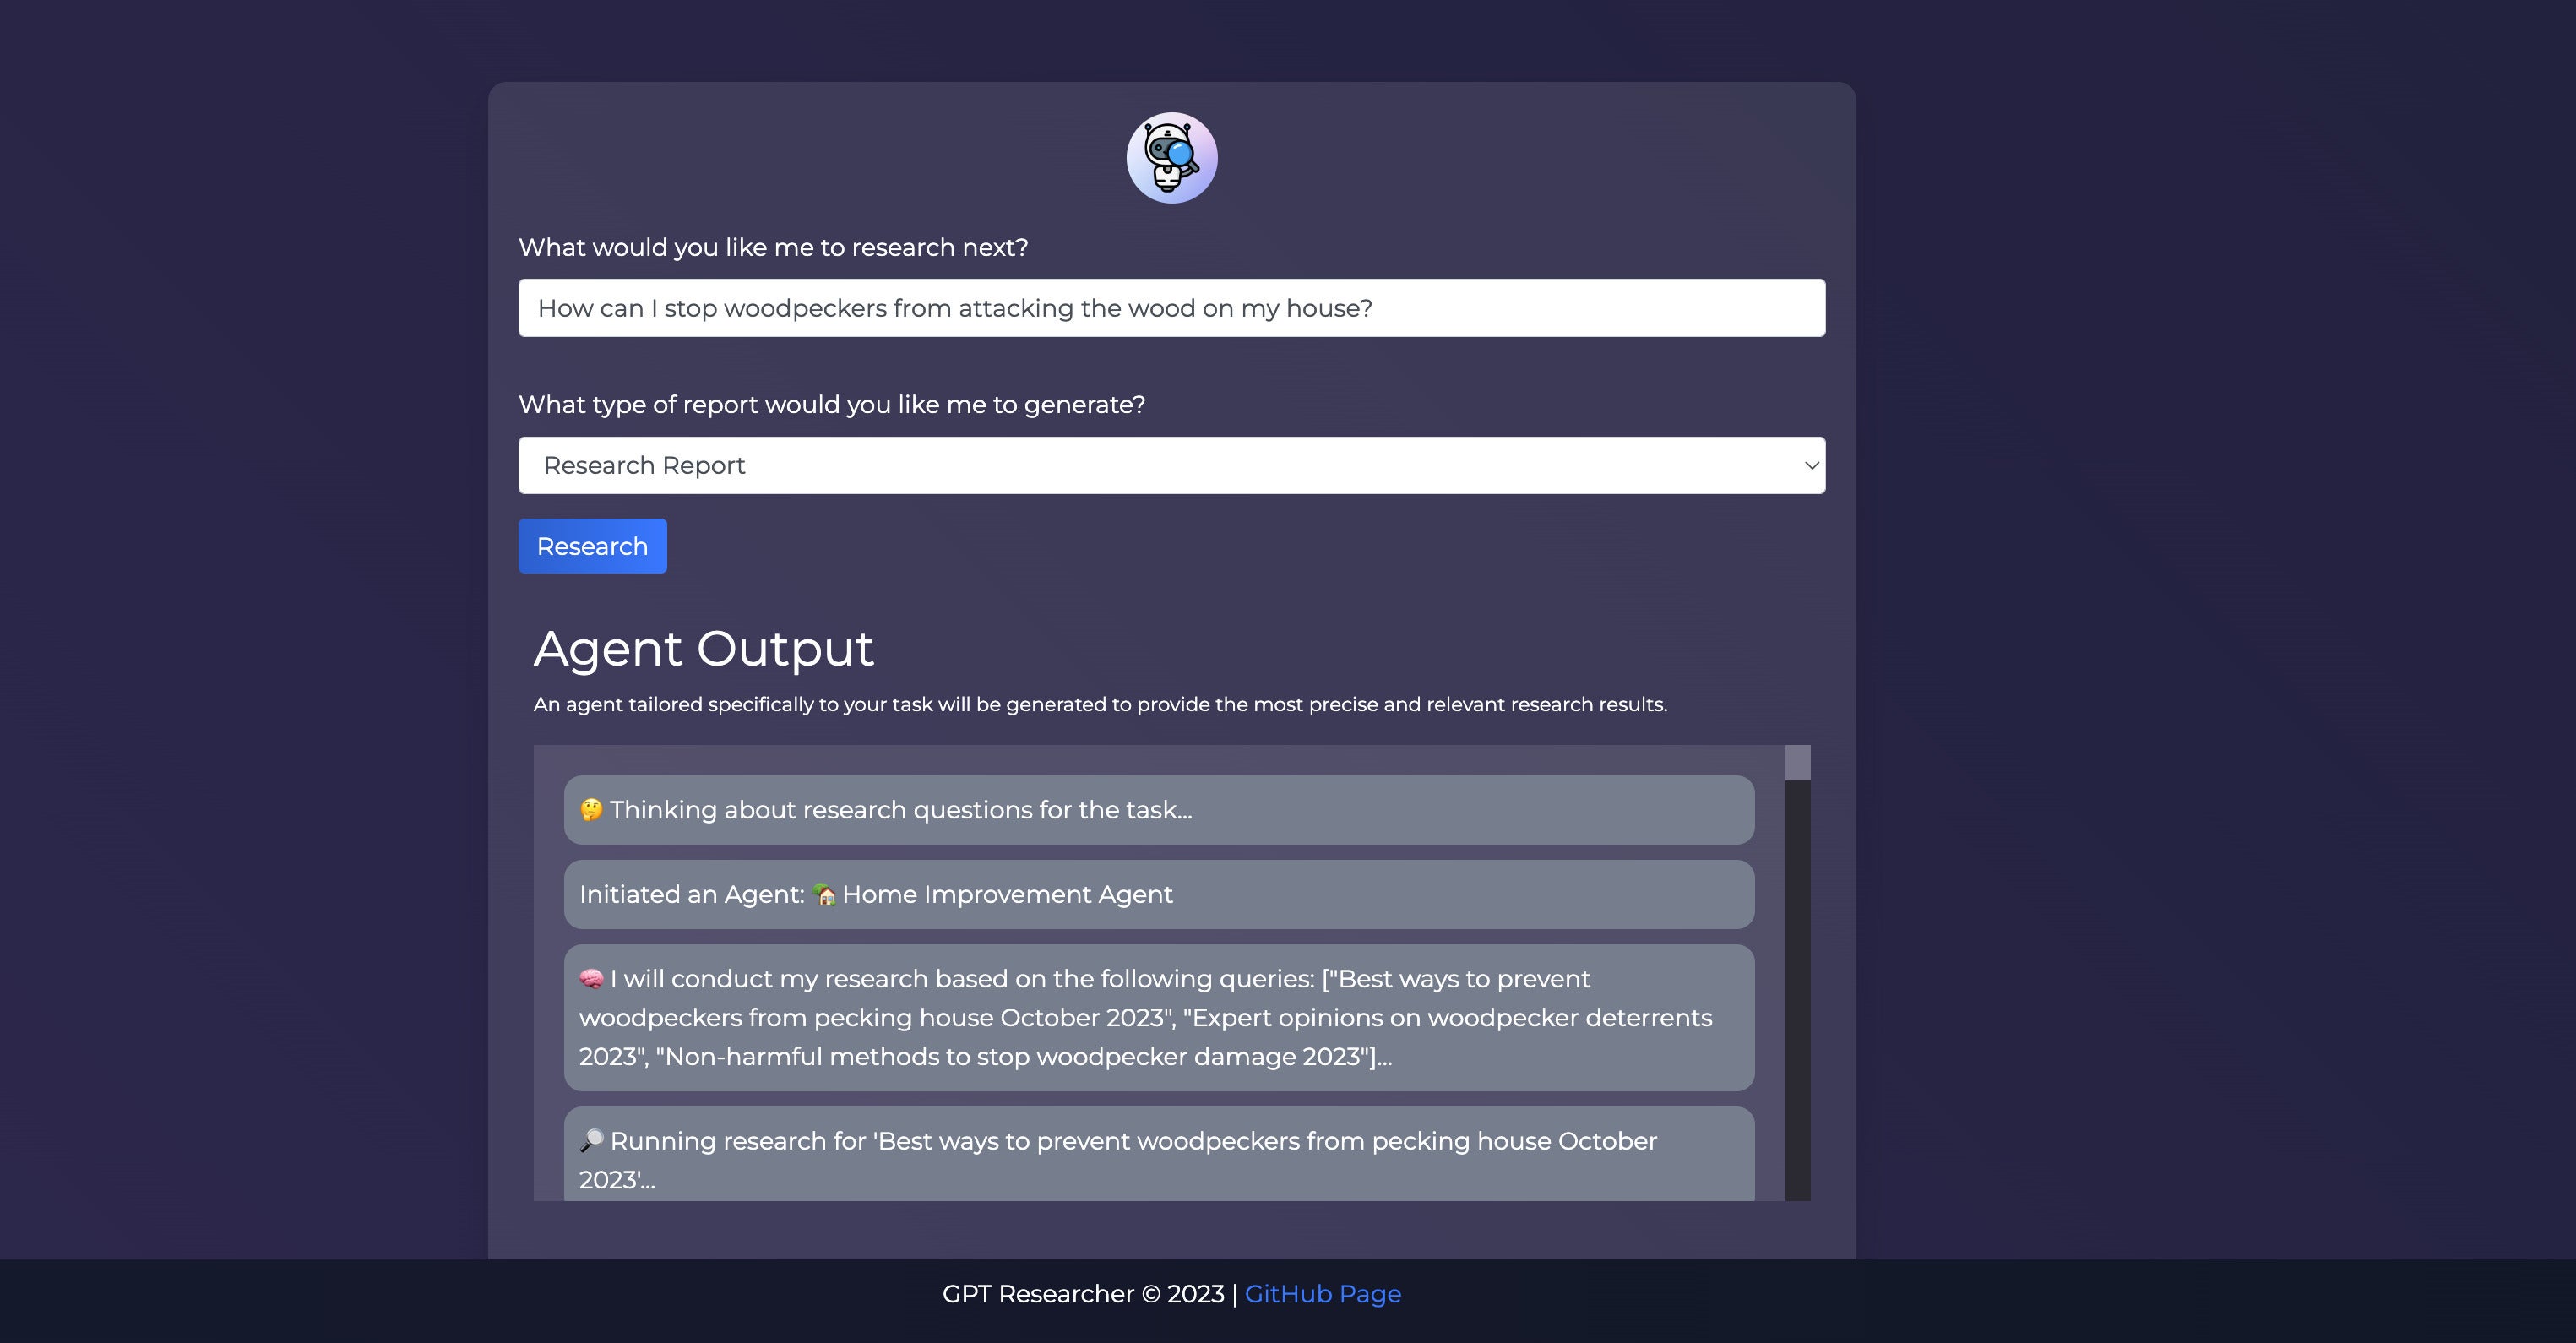 Screenshot by Sharon Machlis.
GPT Researcher in the midst of answering a query.
The result included an abstract, introduction, several sections ("Non-harmful deterrent methods" and "Proactive measures to avoid pecking") as well as a conclusion and references.
The copy-to-clipboard option oddly didn't work on my Mac when the report was generated, although I could download it as a PDF (or select and copy it the old-fashioned way).
The information in this particular report was similar to what I might get from a site like Phind.com, although in a more formal format and perhaps more opinionated about resources. Also, in addition to a research report answering the question, you can ask for a "resource report," and it will return a fair amount of specifics on each of its top resources.
You can change the LLM used by GPT Researcher, although that's not recommended. OpenAI's model is currently considered best suited for the task.
In addition to running GPT Researcher locally, the project includes instructions for running it in a Docker container.
Turn natural language into SQL with LlamaIndex, SQLAlchemy, and OpenAI
There are several ways to turn text into SQL—in fact, I've written about the general concept using R and SQL query engine. However, I wanted to give the Llamaindex sample project using SQLalchemy a try. LlamaIndex is designed to offer "tools to augment your LLM applications with data," which is one of the generative AI tasks that interests me most. SQLAlchemy is a Python database toolkit.
This project doesn't include a web front-end and runs from the command line. For the Python, I mostly used code from the Llamaindex sample notebook.
Project setup
As with previous projects, I first created a new project directory, changed my working directory to the project directory, created and activated a Python virtual environment, and then installed the necessary packages. In this case, the installation code was:
pip install openai sqlalchemy llama-index
If you don't want to use OpenAI, LlamaIndex offers other LLM API options. Or, you can set up to run default LLMs locally, using the provided local LLM setup instructions.
The sample notebook stores your OpenAI API key explicitly in the main file, which you might not want to do as part of a git repository where you might end up sharing your key on GitHub. Instead, you can pip install python-dotenv:
pip install python-dotenv
and create an .env file with
OPENAI_API_KEY="my_api_key"
Then, add the following to a new app.py script:
import os
import openai
from dotenv import load_dotenv
load_dotenv()
openai.api_key = os.getenv("OPENAI_API_KEY")
Next, I cut and pasted some of the sample code into an app.py script:
from llama_index.indices.struct_store.sql_query import NLSQLTableQueryEngine
from sqlalchemy import text
from sqlalchemy import insert
from llama_index.llms import OpenAI
from llama_index import SQLDatabase, ServiceContext
from sqlalchemy import (
    create_engine,
    MetaData,
    Table,
    Column,
    String,
    Integer,
    select,
)
# Create a sample database and table
engine = create_engine("sqlite:///:memory:")
metadata_obj = MetaData()
table_name = "city_stats"
city_stats_table = Table(
    table_name,
    metadata_obj,
    Column("city_name", String(16), primary_key=True),
    Column("population", Integer),
    Column("country", String(16), nullable=False),
)
metadata_obj.create_all(engine)
# Set up an LLM
llm = OpenAI(temperature=0.1, model="gpt-3.5-turbo")
service_context = ServiceContext.from_defaults(llm=llm)
# Create a database object from that table that sqlalchemy can use
sql_database = SQLDatabase(engine, include_tables=["city_stats"])
# Add some sample data to the table
sql_database = SQLDatabase(engine, include_tables=["city_stats"])
rows = [
    {"city_name": "Toronto", "population": 2930000, "country": "Canada"},
    {"city_name": "Tokyo", "population": 13960000, "country": "Japan"},
    {"city_name": "Chicago", "population": 2679000, "country": "United States"},
    {"city_name": "Seoul", "population": 9776000, "country": "South Korea"},
]
for row in rows:
    stmt = insert(city_stats_table).values(**row)
    with engine.begin() as connection:
        cursor = connection.execute(stmt)
# Check to see if the table exists and is usable
stmt = select(
    city_stats_table.c.city_name,
    city_stats_table.c.population,
    city_stats_table.c.country,
).select_from(city_stats_table)
with engine.connect() as connection:
    results = connection.execute(stmt).fetchall()
    print(results)
# Try running a basic SQL query on this table  using sqlalchemy
with engine.connect() as con:
    rows = con.execute(text("SELECT city_name, country from city_stats"))
    for row in rows:
        print(row)
# At last! Time to try a natural language query
query_engine = NLSQLTableQueryEngine(
    sql_database=sql_database,
    tables=["city_stats"],
)
query_str = "Which city has the largest population, and what is that population??"
response = query_engine.query(query_str)
print(f"Answer: {response}")
# You can also see the query in the sqlalchemy metadata
print("Generated from the following SQL:")
print(response.metadata["sql_query"])
You can run the app with a simple python app.py terminal command after adjusting the query and data according to your needs.
More Python generative AI projects
If you'd like to find even more Python generative AI projects, here are some useful online resources.
Shiny for Python chatstream
If you want to try another relatively new Python front-end for LLMs, check out Shiny for Python's chatstream module. It's also still in early stages, with documentation cautioning "this is very much a work in progress, and the API is likely to change." Currently, it only works with the OpenAI API directly.
The GitHub repository features several examples, including a couple of formatting and saving recipes from online cooking blogs. Make sure to read the instructions for using the repo.
Streamlit projects
The Generative AI section on the Streamlit website features several sample LLM projects, including file QA with the Anthropic API (if you have access) and searching with LangChain.
You can also find more projects on the Streamlit blog, such as How to build a real-time LLM app without vector databases, Chat with pandas DataFrames using LLMs, and Build your own Notion chatbot.
WASM Chatbot
The idea of running an LLM-powered chatbot fully client-side in the browser sounds kind of crazy. But if you want to give it a try, check out the LangChain blog post Building LLM-Powered Web Apps with Client-Side Technology. Note that this requires a local installation of Ollama to handle a local LLM. That project currently only runs on macOS or Linux.
LangChain projects
The main LangChain site has several project ideas with code in its use cases section, including text to SQL, summarisation, and text classification. However, some may not be complete start-to-finish applications.
In addition, you can see the code powering LangChain's Chat LangChain chatbot. Just note that without modification, that project requires an account with Weaviate (minimum $25 per month or your databases disappear after 14 days), as well as an installation of Next.js on the front end. It's a nice app, though.
A graph generated by the Chat With Your Data LLM-powered application.
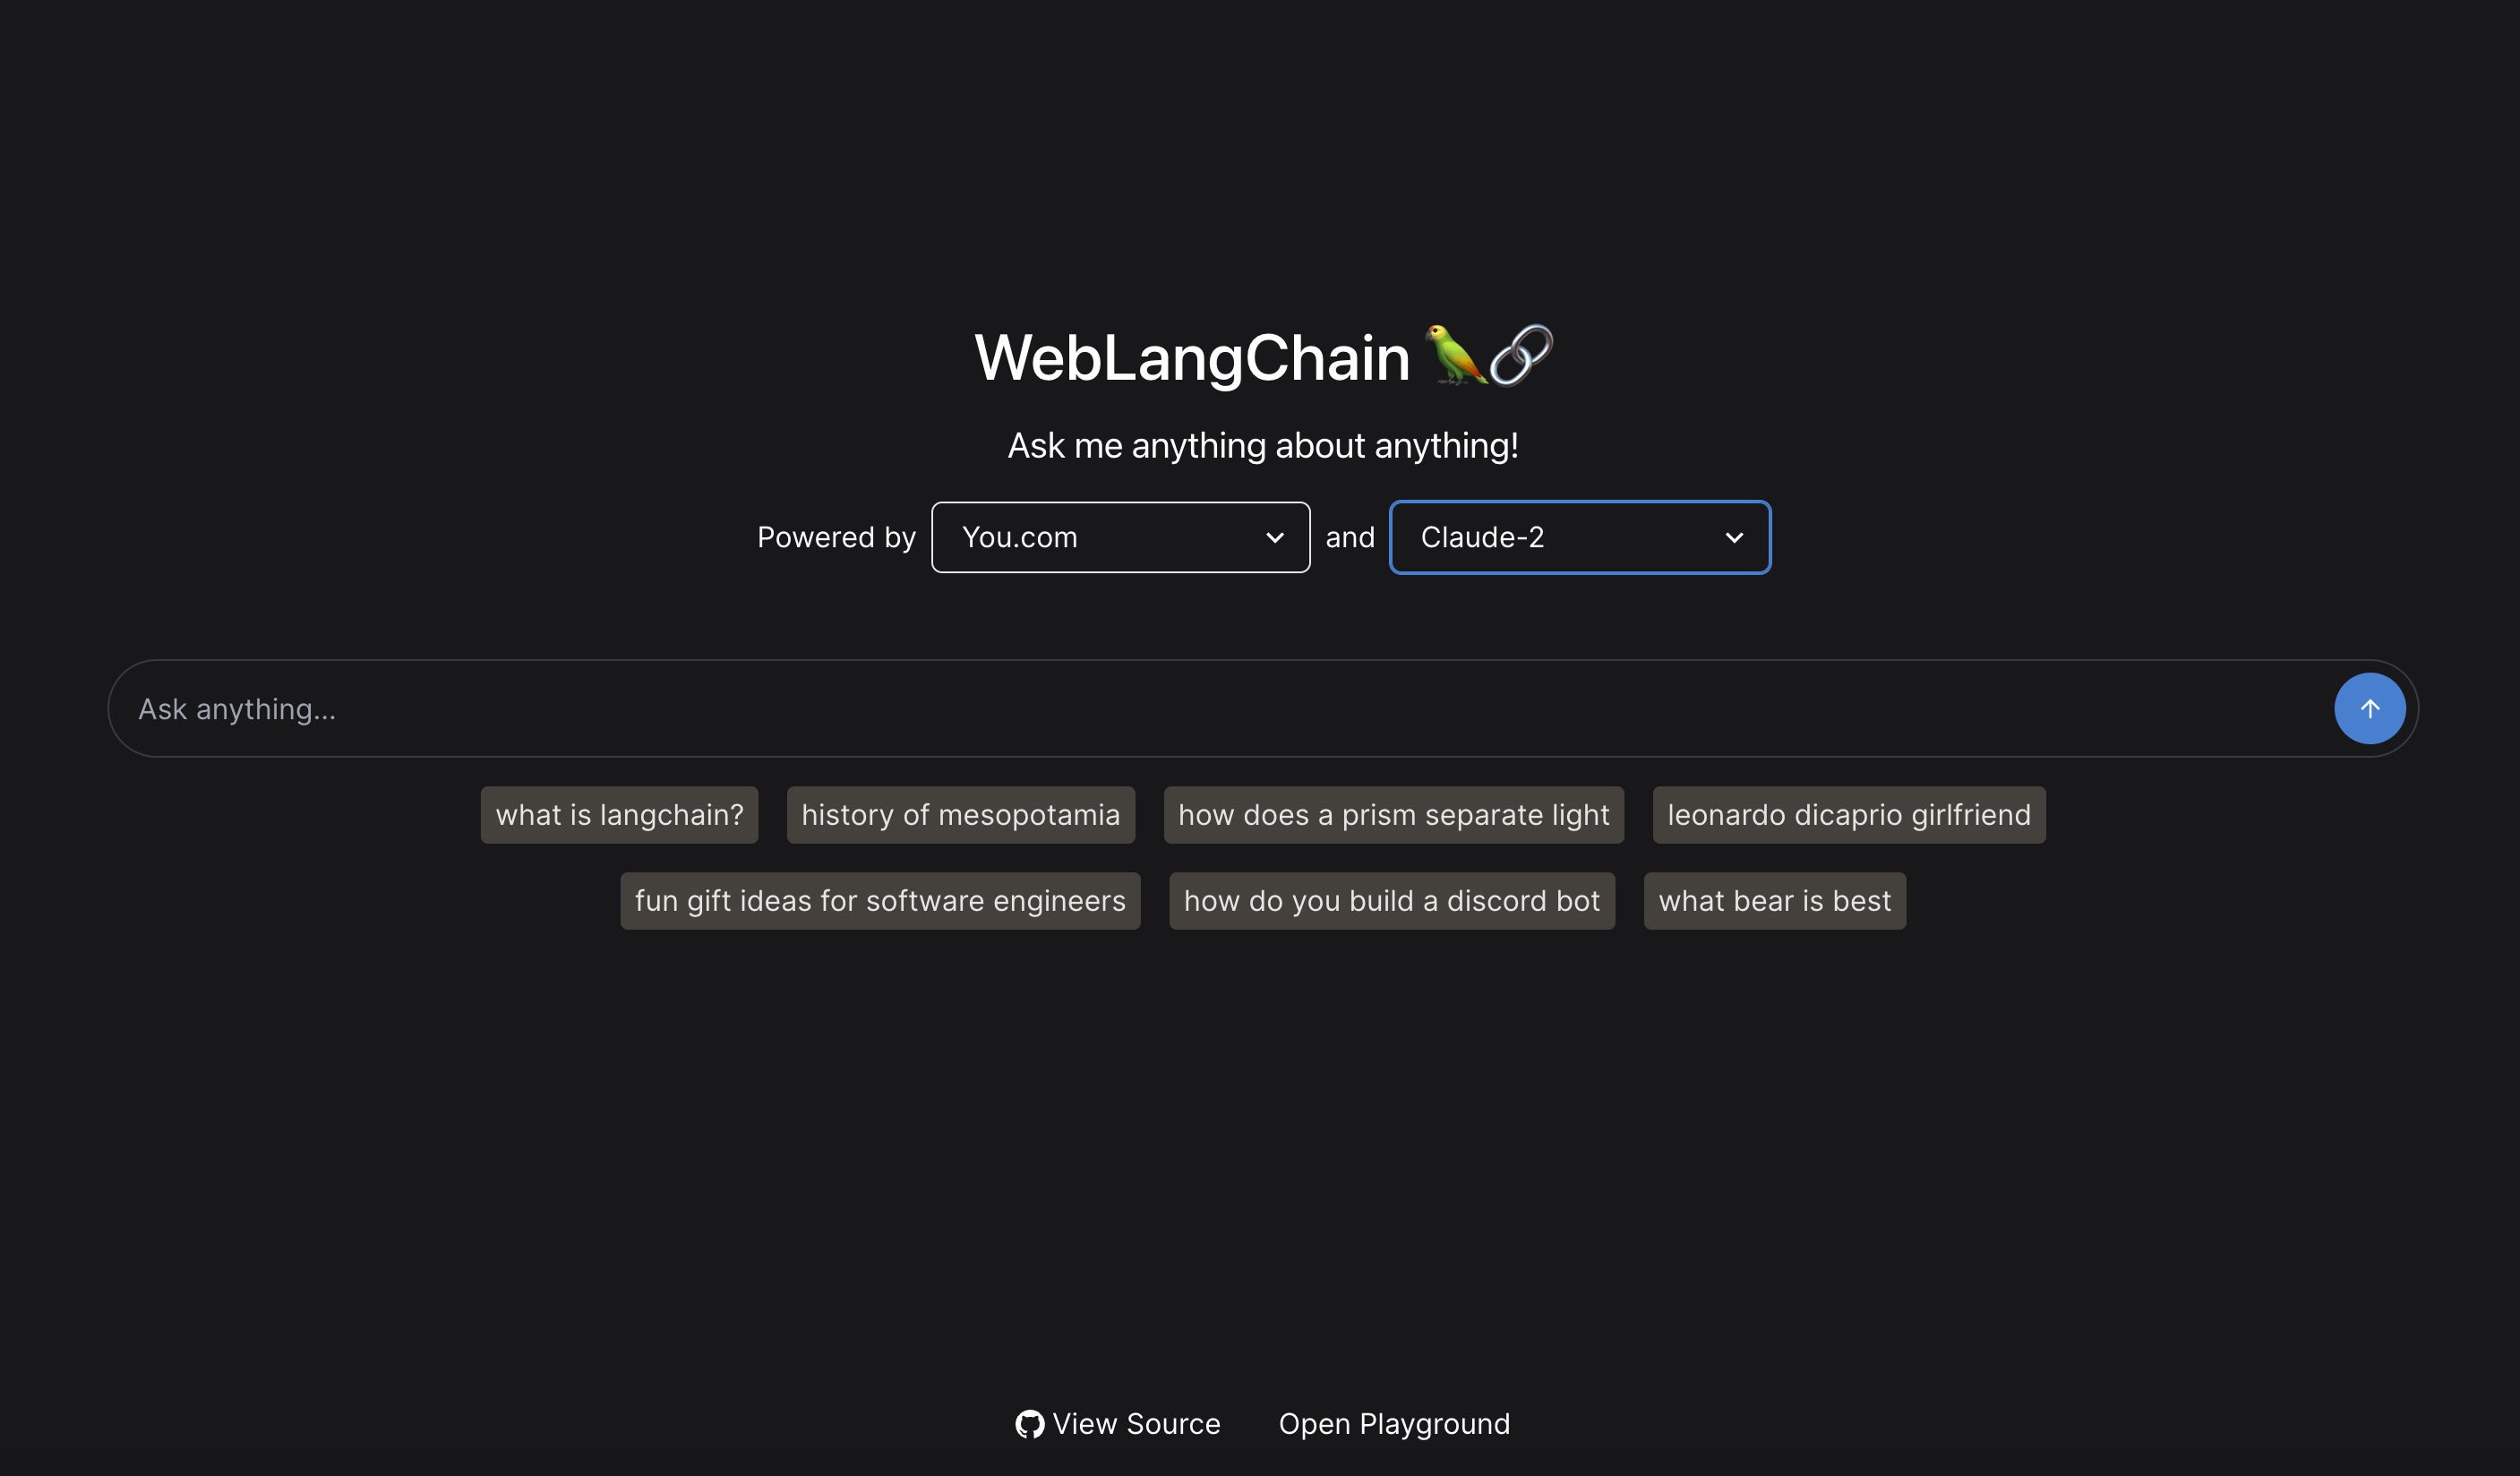
An even more sophisticated LangChain app offers AI-enhanced general web searching with the ability to select both the search API and LLM model. The code is on GitHub.
Chainlit projects
If Chainlit piqued your interest, there are a few more projects with code that you can look at. There's also a GitHub cookbook repository with over a dozen more projects.
Happy coding!


